Create A Chatting App
Create the rails application
We are ready to create our new rails application:
rails new chatting_app
Note: We didn’t define a name for the application and rails will resolve it using the directory name: chatting app
Rails will create all the application’s files and install the required gems.
Let’s start the application to make sure that everything if fine.
rails server
You should see something like:
=> Booting Puma
=> Rails 5.2.3 application starting in development
=> Run `rails server -h` for more startup options
Puma starting in single mode...
* Version 3.12.1 (ruby 2.6.2-p47), codename: Llamas in Pajamas
* Min threads: 5, max threads: 5
* Environment: development
* Listening on tcp://localhost:3000
Use Ctrl-C to stop
Open a browser and visit
http://localhost:3000, if you see this we are good to go.
Step-1(Add User Devise)
We are going to use the awesome devise solution for authentication.
Append the following gem requirement at the bottom of the
Gemfile file located at the root of the application’s directory.gem 'devise'
On your terminal, install the new gem by executing:
bundle install
Finish integration with devise using:
rails generate devise:install
We will create the model representing our uses using the devise generators.
On your terminal, execute:
rails generate devise User username:string
Note: we have added an extra attribute
username to our model (besides the defaults generated by devise) so that we have something more friendly to present when displaying users instead of their email.
Open the generated migration which you will find under
db/migrate/<datetime>_devise_create_users.rb and append the username’s unique index definition with[4]: add_index :users, :username, unique: true
Find the line in the file that defines the
username column and change it to:t.string :username, null: false
to make the attribute required.
Then in the User model which is located at
app/models/user.rb add the validation rule for uniqueness and presence: validates :username, uniqueness: true, presence: true
Finally, apply the database migration using:
rails db:migrate
Rooms and messages
Each chat message is going to take place in the context of a room.
Let’s build them all.
Use the following command to create the
Room:rails generate resource Room name:string:uniq
and the following command to create the
RoomMessage:rails generate resource RoomMessage room:references user:references message:text
Open
app/models/room.rb and add the relation inside the class:has_many :room_messages, dependent: :destroy,
inverse_of: :room
Open
app/models/room_message.rb and add the relations inside the class:belongs_to :user
belongs_to :room, inverse_of: :room_messages
Migrate the database with:
rails db:migrate
We can now setup our routes so that the root request is served by the
RoomsController#index action.
Open your
config/routes.rb file and change its contents to:Rails.application.routes.draw do
devise_for :users
root controller: :rooms, action: :index
resources :room_messages
resources :rooms
end
Restart the server and try to navigate to the application’s root url.
You should see an error message, no worries:

We have to create the
index action in the RoomsController. Open the controller app/controllers/rooms_controller.rb and change its contents to the following:class RoomsController < ApplicationController
def index
end
end
Then create the file
app/views/rooms/index.html.erb and for now just add the following:<h1>Rooms index</h1>
Reload and voilà.

Adding authentication
app/controllers/application_controller.rb:
before_action :authenticate_user!
If we navigate to
http://localhost:3000 now we should be redirected to the sign in page [10].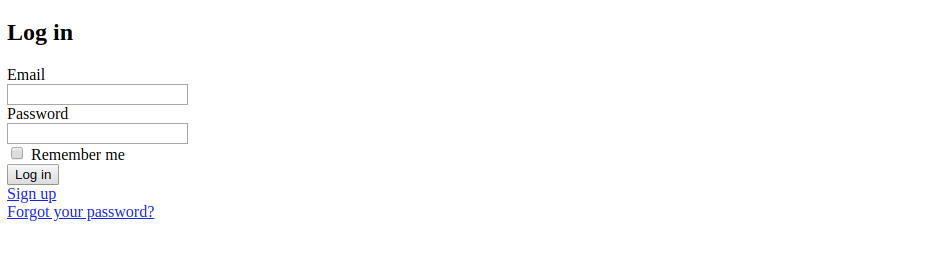
Before continuing with the good stuff, let’s gear up the application with some good features.
Add bootstrap
We are going to use Bootstrap and we will integrate it in the application using the bootstrap-rubygem gem.
Following the instructions of the gem, append the dependencies in your
Gemfile.gem 'bootstrap'
gem 'jquery-rails'
and execute
bundle to fetch and install it.
Change the
app/assets/stylesheets/application.css files extension to scss and replace its contents with:@import "bootstrap";
Add the following lines to the
app/assets/javascript/application.js just before the //= require_tree . line[9]://= require jquery3
//= require popper
//= require bootstrap-sprockets
Add simple_form
We are going to use this great gem to generate forms easily.
Append the gem dependency in your
Gemfile and bundle to install it.gem 'simple_form'
Then complete the integration using:
rails generate simple_form:install --bootstrap
Note: We used the –bootstrap directive since that’s the framework we are using.
Devise views with bootstrap and simple form
Devise uses its own views for sign in, register etc. But we do have a way to customize these views and now that we have ended up using bootstrap and simple forms, we can generate these views in a way that our choices are respected.
In your terminal:
rails generate devise:views
The view for signing in is under
app/views/devise/sessions/new.html.erb and for signing up is under app/views/devise/registrations/new.html.erb. Open these two files and change the submit button’s class by replacing the following line[6]:<%= f.button :submit, "Sign up" %>
with
<%= f.button :submit, "Sign up", class: 'btn btn-success' %>
to render the buttons bootstrap style.
Before viewing our changes, let’s do one last thing in our default layout.
Open
app/views/layouts/application.html.erb and replace its contents with:<!DOCTYPE html>
<html>
<head>
<title>RailsChatTutorial</title>
<%= csrf_meta_tags %>
<%= csp_meta_tag %>
    <%= stylesheet_link_tag    'application', media: 'all', 'data-turbolinks-track': 'reload' %>
    <%= javascript_include_tag 'application', 'data-turbolinks-track': 'reload' %>
</head>
<body>
<div class="container">
<div class="row">
<div class="col-12">
<%= yield %>
</div>
</div>
</div>
</body>
</html>
This last one was to use Bootstrap’s grid in our views.
Navigate to
http://localhost:3000 and view what we have created.
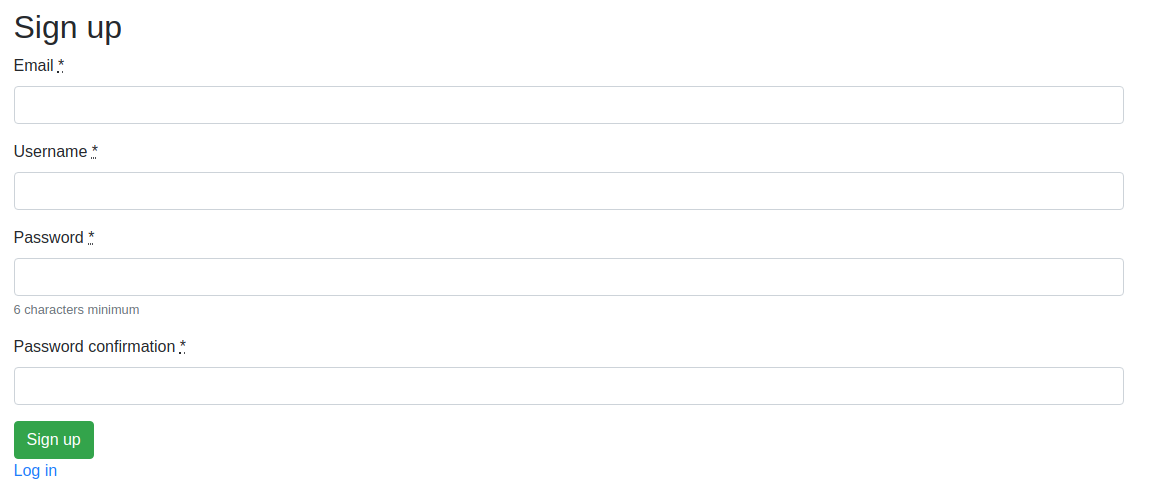
Let’s try to sign up following the
Sign up link of the form: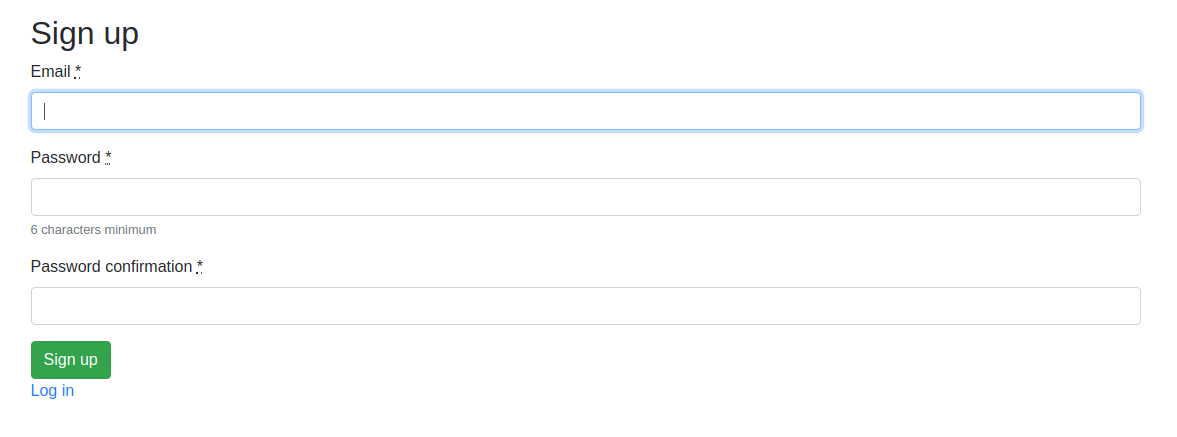
As you can see, there is no field to fill in the username. For that to work we have to:
- Add the field in the sign up form
- Configure devise to accept the new attribute (
username) or else theApplicationControllerwill ignore it once submitted from the form.
To add the field in the sign up form, open
app/views/devise/registrations/new.html.erb and add these lines between the email and password fields. <%= f.input :username,
required: true %>
Then, open the
app/controllers/application_controller.rb file to configure the new attribute. Change the contents to:class ApplicationController < ActionController::Base
before_action :authenticate_user!
before_action :configure_permitted_parameters, if: :devise_controller?
protected
def configure_permitted_parameters
devise_parameter_sanitizer.permit(:sign_up, keys: [:email, :username])
end
end
Done, reload and sign up[5].
Cleanup unused components
We will not be using
coffee script or turbolinks so let’s remove all the related stuff.
Open
Gemfile and remove the following lines:# Use CoffeeScript for .coffee assets and views
gem 'coffee-rails', '~> 4.2'
# Turbolinks makes navigating your web application faster. Read more: https://github.com/turbolinks/turbolinks
gem 'turbolinks', '~> 5'
Open
app/assets/javascripts/application.js and remove the following line://= require turbolinks
Open
app/views/layouts/application.html.erb and change the following lines [3]: <%= stylesheet_link_tag 'application', media: 'all', 'data-turbolinks-track': 'reload' %>
<%= javascript_include_tag 'application', 'data-turbolinks-track': 'reload' %>
to
    <%= stylesheet_link_tag    'application', media: 'all' %>
    <%= javascript_include_tag 'application' %>
Check that your
app/assets/javascripts folder doesn’t have any files with extension .coffee and if you find any, remove them.2
In the terminal, also execute the following command:
rails tmp:cache:clear
to clear any cached compiled coffee scripts.
Done. Restart you server.
add this line to application.helper
def gravatar_url(user)
  gravatar_id = Digest::MD5::hexdigest(user.email).downcase
  url = "https://gravatar.com/avatar/#{gravatar_id}.png"
end
application under the name
app/assets/stylesheets/rails-chat-tutorial.scss.
For now add the rule for the avatar:
.avatar {
  max-height:30px;
  border-radius: 15px;
  width:auto;
  vertical-align:middle;
}
and open
application.scss to import the newly created stylesheet. Add the line:@import "rails-chat-tutorial"
We have to add this partial in the application layout. Edit
app/views/layouts/application.html.erb and change its contents to:<!DOCTYPE html>
<html>
<head>
<title>RailsChatTutorial</title>
<%= csrf_meta_tags %>
<%= csp_meta_tag %>
<%= stylesheet_link_tag 'application', media: 'all' %>
<%= javascript_include_tag 'application' %>
</head>
<body>
<div class="container">
<div class="row">
<div class="col-12">
<%= render partial: 'shared/navigation_bar' %>
<div class="my-3">
<%= yield %>
</div>
</div>
</div>
</div>
</body>
</html>
Reload to view the bar.
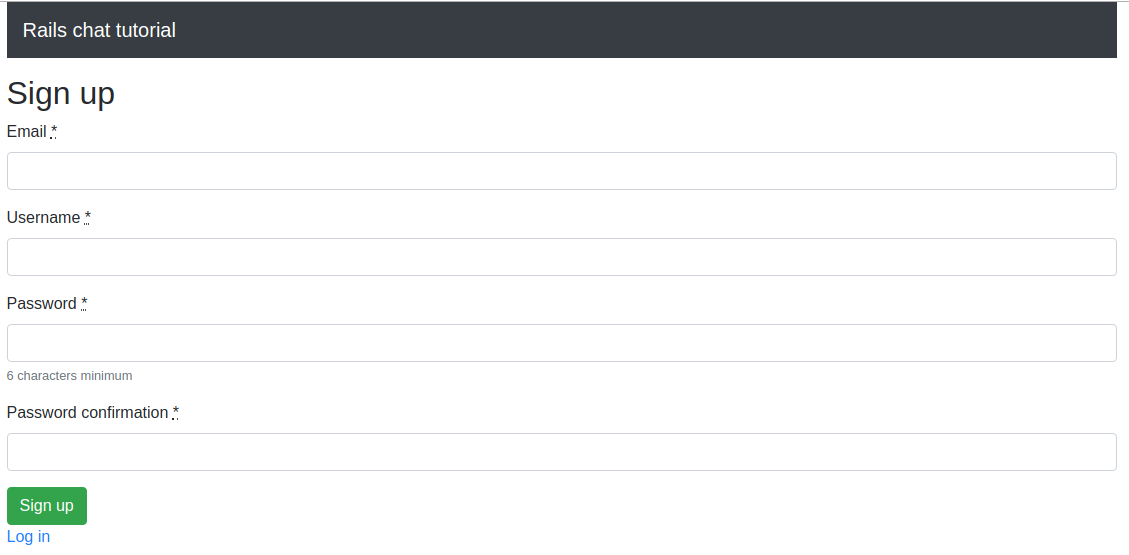
Awesome. Fill in with your desired credentials and submit the form.

Room management
We are going to create a simple layout for groups.
- One narrow column displaying vertically all the available rooms
- One wide column which is going to host the chat messages and form.
The rooms index page will have the second column empty since this column will be present only when user is inside a specific room.
In the index page we will provide the option to create a room.
Room index
First we have to load all rooms in the
RoomsController. Open app/controllers/rooms_controller.rb and change the index action as:def index
@rooms = Room.all
end
Open
app/views/rooms/index.html.erb and change its contents to[8]:<div class="row">
<div class="col-12 col-md-3">
<div class="mb-3">
<%= link_to new_room_path, class: "btn btn-primary" do %>
Create a room
<% end %>
</div>
<% if @rooms.present? %>
<nav class="nav flex-column">
<% @rooms.each do |room| %>
<%= link_to room.name, room_path(room), class: "nav-link room-nav-link" %>
<% end %>
</nav>
<% else %>
<div class="text-muted">
The are no rooms
</div>
<% end %>
</div>
<div class="col">
<div class="alert alert-primary">
<h4 class="alert-heading">
Welcome to the RailsChatTutorial!
</h4>
<p>
We need to talk.
</p>
<hr />
<p>
You can create or join a room from the sidebar.
</p>
</div>
</div>
If there are rooms, the left column of the page will render a vertical navigation with links leading to each room’s page. The right column displays a simple welcome message.
Pressing the
Create a room button we get the expected error for the non-existent action. |
| screennshot from aiden project1 |
Room new/edit
We have to define the actions for creating and updating a room.
Open the
app/controllers/rooms_controller.rb and change its contents to:class RoomsController < ApplicationController
# Loads:
# @rooms = all rooms
# @room = current room when applicable
before_action :load_entities
def index
  @rooms = Room.all
end
def new
@room = Room.new
end
def create
@room = Room.new permitted_parameters
if @room.save
flash[:success] = "Room #{@room.name} was created successfully"
redirect_to rooms_path
else
render :new
end
end
def edit
end
def update
if @room.update_attributes(permitted_parameters)
flash[:success] = "Room #{@room.name} was updated successfully"
redirect_to rooms_path
else
render :new
end
end
protected
def load_entities
@rooms = Room.all
@room = Room.find(params[:id]) if params[:id]
end
def permitted_parameters
params.require(:room).permit(:name)
end
end
Note: we preload the
@rooms and the @room variables making them available to all actions with the before_action :load_entities hook.
We will create a simple form for the
Room object and we will use it both when creating and editing a room. Create the app/views/rooms/_form.html.erb and add:<%= simple_form_for @room do |form| %>
<%= form.input :name %>
<%= form.submit "Save", class: 'btn btn-success' %>
<% end %>
Then, create the views for the
new/edit action accordingly:
app/views/rooms/new.html.erb
<h1>
  Creating a room
</h1>

<%= render partial: 'form' %>
app/views/rooms/edit.html.erb
<h1>
  Editing room <%= @room.name %>
</h1>

<%= render partial: 'form' %>
Time to create the first room. From the rooms’ index page, press the
Create a room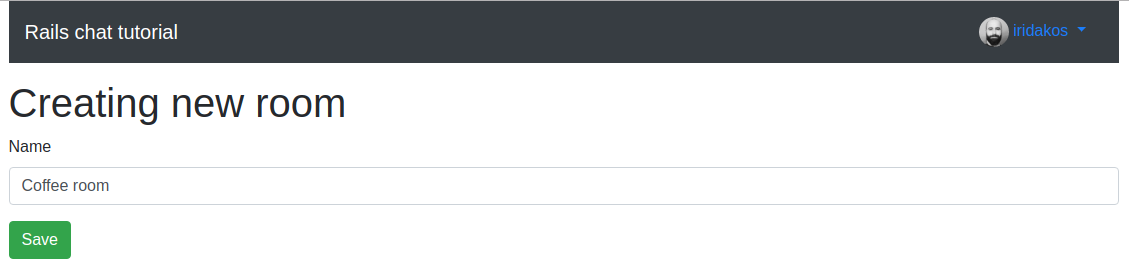
Save and here it is.
Add this class in
app/assets/stylesheets/rails-chat-tutorial.scss to improve the display of the rooms..room-nav-link {
border: 1px solid lighten($primary, 40%);
background: lighten($primary, 45%);
& + .room-nav-link {
border-top: 0 none;
}
}
Note: We will add the
edit link in the room’s page a.k.a. show action.
Before moving on to the Room page, we will refactor the index page so as to be able to use the left column’s content inside the room page as well.


Create the partial
app/views/rooms/_rooms.html.erb with contents:<div class="mb-3">
<%= link_to new_room_path, class: 'btn btn-primary' do %>
Create a room
<% end %>
</div>
<% if @rooms.present? %>
<nav class="nav flex-column">
<% @rooms.each do |room| %>
<%= link_to room.name, room_path(room), class: 'nav-link room-nav-link' %>
<% end %>
</nav>
<% else %>
<div class="text-muted">
The are no rooms
</div>
<% end %>
and change the
app/views/rooms/index.html.erb to use it:<div class="row">
<div class="col-12 col-md-3">
<%= render partial: 'rooms' %>
</div>
<div class="col">
<div class="alert alert-primary">
<h4 class="alert-heading">
Welcome to the RailsChatTutorial!
</h4>
<p>
We need to talk.
</p>
<hr />
<p>
You can create or join a room from the sidebar.
</p>
</div>
</div>
</div>
Room page
Add the
show action in the app/controllers/rooms_controller.rb:def show
@room_message = RoomMessage.new room: @room
@room_messages = @room.room_messages.includes(:user)
end
Notes:
- We construct a new room message which we are going to use in the view to build a form for creating the chat messages.
- When displaying the room message, we access its user’s email attribute to resolve the gravatar hash. We used
.includes(:user)in the query for the@room_messagesto fetch them along with their users avoiding N+1 queries[1].
Create the view
app/views/rooms/show.html.erb:<h1>
<%= @room.name %>
</h1>
<div class="row">
<div class="col-12 col-md-3">
<%= render partial: 'rooms' %>
</div>
<div class="col">
<div class="chat">
<% @room_messages.each do |room_message| %>
<%= room_message %>
<% end %>
</div>
<%= simple_form_for @room_message, remote: true do |form| %>
<div class="input-group mb-3">
<%= form.input :message, as: :string,
wrapper: false,
label: false,
input_html: {
class: 'chat-input'
} %>
<div class="input-group-append">
<%= form.submit "Send", class: 'btn btn-primary chat-input' %>
</div>
</div>
<%= form.input :room_id, as: :hidden %>
<% end %>
</div>
</div>
Notes:
- We reused the
app/views/rooms/_rooms.html.erbpartial that we created in the previous step - We added a
divwith class.chatand this is where the room’s messages are renderer. - We added a form for the
@room_messagethat we instantiated in the controller. We also used the directiveremote: truewhen we instantiated the form thus the form is going to be submitted by Ajax. - We added a hidden field for the attribute
:room_idso that the value reaches theRoomMessagesControlleronce we submit the form.
Style the chat components by adding the following lines to the
app/assets/stylesheets/rails-chat-tutorial.scss:.chat {
border: 1px solid lighten($secondary, 40%);
background: lighten($secondary, 50%);
height: 50vh;
border-radius: 5px 5px 0 0;
overflow-y: auto;
}
.chat-input {
border-top: 0 none;
border-radius: 0 0 5px 5px;
}
Navigate to a room to see what has been done.
Pressing the
Send button nothing happens on the page but if you check the server’s console you will notice:AbstractController::ActionNotFound (The action 'create' could not be found for RoomMessagesController):
Let’s fix that.


Creating room messages
This is going to be easy. All we have to do is implement the
create action in the RoomMessagesController.
app/controllers/room_messages_controller.rb
class RoomMessagesController < ApplicationController
  before_action :load_entities

  def create
    @room_message = RoomMessage.create user: current_user,
                                       room: @room,
                                       message: params.dig(:room_message, :message)
  end

  protected

  def load_entities
    @room = Room.find params.dig(:room_message, :room_id)
  end
end
Notes:
- we preload the room using the
room_idparameter that we added as a hidden field in the form in the previous step - we create a new message for the room setting its user to currently signed in user
If you try to submit a message now, again you will see nothing but in the server console you can see from the log that the room message has been created.
Started POST "/room_messages" for ::1 at 2019-04-04 19:24:33 +0300
Processing by RoomMessagesController#create as JS
  Parameters: {"utf8"=>"✓", "room_message"=>{"message"=>"My first message", "room_id"=>"8"}, "commit"=>"Send"}
  User Load (0.2ms)  SELECT  "users".* FROM "users" WHERE "users"."id" = ? ORDER BY "users"."id" ASC LIMIT ?  [["id", 1], ["LIMIT", 1]]
  ↳ /home/iridakos/.rvm/gems/ruby-2.6.2@rails-chat-tutorial/gems/activerecord-5.2.3/lib/active_record/log_subscriber.rb:98
  Room Load (0.2ms)  SELECT  "rooms".* FROM "rooms" WHERE "rooms"."id" = ? LIMIT ?  [["id", 8], ["LIMIT", 1]]
  ↳ app/controllers/room_messages_controller.rb:13
   (0.1ms)  begin transaction
  ↳ app/controllers/room_messages_controller.rb:5
  RoomMessage Create (0.7ms)  INSERT INTO "room_messages" ("room_id", "user_id", "message", "created_at", "updated_at") VALUES (?, ?, ?, ?, ?)  [["room_id", 8], ["user_id", 1], ["message", "My first message"], ["created_at", "2019-04-04 16:24:33.456641"], ["updated_at", "2019-04-04 16:24:33.456641"]]
  ↳ app/controllers/room_messages_controller.rb:5
   (4.0ms)  commit transaction
  ↳ app/controllers/room_messages_controller.rb:5
No template found for RoomMessagesController#create, rendering head :no_content
Completed 204 No Content in 88ms (ActiveRecord: 5.1ms)
A user would expect to have the message field cleared after sending a new message. We don’t disappoint users.
Create a file
app/assets/javascripts/room.js and add the following:$(function() {
$('#new_room_message').on('ajax:success', function(a, b,c ) {
$(this).find('input[type="text"]').val('');
});
});
We bind to the
ajax:success event triggered by Rails on successful submission of the form and all we want to do is clear the text field’s value.
Reload the page and try submitting again and check it out. The field value should be emptied after sending the message.
Displaying room messages
If you reload the page you will see something like this:
Let’s beautify the messages.
Replace the contents of
app/views/rooms/show.html.erb with:<h1>
<%= @room.name %>
</h1>
<div class="row">
<div class="col-12 col-md-3">
<%= render partial: 'rooms' %>
</div>
<div class="col">
<div class="chat">
<% @room_messages.each do |room_message| %>
<div class="chat-message-container">
<div class="row no-gutters">
<div class="col-auto text-center">
<img src="<%= gravatar_url(room_message.user) %>" class="avatar" alt="">
</div>
<div class="col">
<div class="message-content">
<p class="mb-1">
<%= room_message.message %>
</p>
<div class="text-right">
<small>
<%= room_message.created_at %>
</small>
</div>
</div>
</div>
</div>
</div>
<% end %>
</div>
<%= simple_form_for @room_message, remote: true do |form| %>
<div class="input-group mb-3">
<%= form.input :message, as: :string,
wrapper: false,
label: false,
input_html: {
class: 'chat-input'
} %>
<div class="input-group-append">
<%= form.submit "Send", class: 'btn btn-primary chat-input' %>
</div>
</div>
<%= form.input :room_id, as: :hidden %>
<% end %>
</div>
</div>

and add the following css classes inside the .chat class:
.chat-message-container {
  padding: 5px;

  .avatar {
    margin: 5px;
  }

  .message-content {
    padding: 5px;
    border: 1px solid $primary;
    border-radius: 5px;
    background: lighten($primary, 10%);
    color: $white;
  }

  & + .chat-message-container {
    margin-top: 10px;
  }
}
Reload the page. Magic.

Comments
Post a Comment